4-12.1 INSTALLATION OF CEP MODIFICATION KIT (CEP-EQUIPPED HELMETS ONLY)
Installation of the CEP modification kit requires (1) attaching the connector to the helmet, (2)
attaching the interface harness to the communications cord leads inside the right earcup, and
(3) checking the earcup fit.
Tools and Materials Needed
a. Attaching CEP Interface Harness (CEP900-I04) to Helmet
1. Position the helmet with the right shell eardome down (resting on the table) and the
interior facing you, with the chinstrap unlaced from the D-rings.
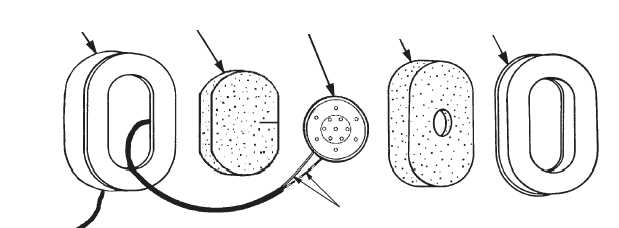
2. Referring to Figure 4-12.1, remove the right earcup from the helmet and remove the
earseal.
3. Remove the receiver retainer, the receiver, and the filler pad from the earcup.
4. Using a jeweler’s screwdriver, remove the communications cord leads from the re-
ceiver.
5. Remove the communications cord with the grommet from the earcup.
6. Remove the template page from the middle of the booklet TP0201, included with the
CEP Modification Kit. Cut the template out in accordance with the procedures on the
template page.
Electric drill
1/8-inch drill bit
1/4-inch drill bit
3/8-inch drill bit
Jeweler’s screwdriver
Long-nose pliers
Pencil or ballpoint pen
Small narrow-blade screwdriver
Solder, type 40/60 rosin core
Soldering iron with small tip, not to
exceed 40 watts
Wire strippers
Razor knife
Awl
Steel ruler
Scissors
Intercommunications Unit
7/16-inch open-end wrench
Figure 4-12.1. Earcup with Pads and Earphone Removed
EARCUP
FILLER PAD
RECEIVER
RECEIVER
RETAINER
EARSEAL
LEADS
Change 3
4-18.1
TM 1-8415-216-12&P