TM 1-5855-265-20
3-31
3-10. RIM CLENCHING CLAMP REPLACEMENT (cont)
REMOVAL - TYPE I
CAUTION
PNVS window cover assembly must be
installed before starting this task. Optical
coating on window could be damaged if PNVS
window cover assembly is not installed.
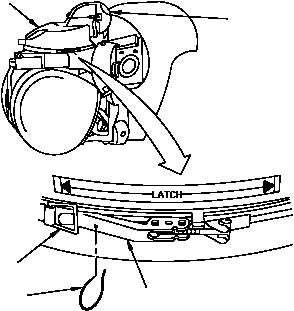
1. Move PNVS turret assembly (1) 30° out of stow
(para 3-3). At this point, PNVS window cover
assembly (2) should be 90° to the left of
forward position.
2. Remove safety wire (3) securing locking ring
(4) to latch handle (5).
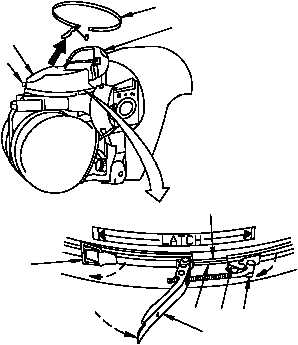
3. Remove rim clenching clamp (8).
a. Pull locking ring (4) until locking ring clears
latch handle (5).
b. Pull latch handle (5) until T-bolt (6) unhooks
from catch (7).
c. Disengage rim clenching clamp (8) from
mated rims (9 and 10).
d. Spread rim clenching clamp (8) wide
enough to clear balance weight (11).
e. Lift left side of rim clenching clamp (8) past
balance weight (11).
f. With rim clenching clamp (8) tilted, lift rim
clenching clamp along a sloped path past
the PNVS window cover assembly (2).
g. Tag rim clenching clamp (8) and PNVS
shroud assembly (12).
310-025
4
3
5
1
2
PULL
UNHOOK
PULL
310-026
4
5
10
7
6
9
11
12
8
2
LIFT


